Beyond Just Temperature: HVAC’s Role in Ambiance
When you think about your home’s atmosphere, you might picture cozy furniture, soft lighting, or your favorite color on the walls. But what about the invisible elements? The heating, ventilation, and air conditioning (HVAC) system is a silent partner in creating a truly comfortable home. It does more than just heat or cool; it manages the very air you breathe, influencing how a room feels the moment you walk in. For truly exceptional comfort, a professional approach to HVAC in Frederick, MD is foundational.
The psychological effect of your home’s climate is profound. A stuffy, humid room can make you feel sluggish and irritable, while a room that’s too cold feels unwelcoming. Your HVAC system sets the stage for every experience within your walls. A properly functioning unit creates a consistent and refreshing environment that promotes relaxation, focus, and general well-being, making your home a true sanctuary.
The Sound of Silence: Noise Levels and Serenity 🎧
Nothing shatters a peaceful evening at home like a loud, clanking air conditioner or a groaning furnace. Intrusive sounds from your HVAC system can be a constant source of annoyance, raising stress levels and disrupting sleep. The ambiance of a quiet, serene home is often taken for granted until it’s gone. Modern systems are designed for whisper-quiet operation, allowing the peaceful sounds of your home to take center stage.
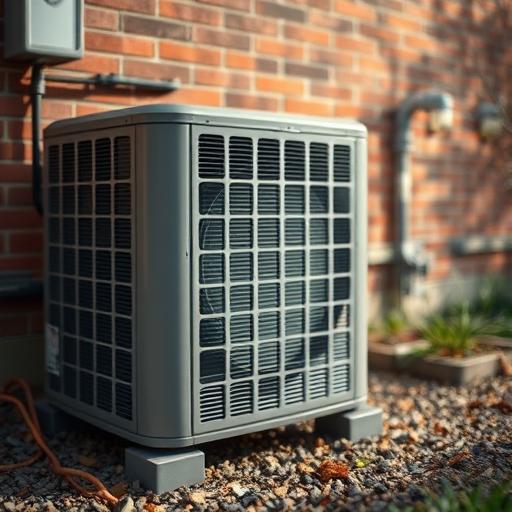
What causes all that racket? Often, it’s a sign of an aging unit, improperly sized equipment, or a need for maintenance. Loose parts, unbalanced fans, or struggling motors all contribute to the noise pollution. Investing in regular tune-ups or upgrading to a newer, quieter model can restore tranquility, ensuring the only thing you hear is the gentle hum of a perfectly comfortable home.
Breathe Easy: Air Quality and a Healthy Home
The quality of the air inside your home is a major component of its overall ambiance. Your HVAC system is the home’s respiratory system, circulating air through every room. If its filters are dirty or the system is inadequate, it can also circulate dust, pet dander, pollen, and other irritants. This directly impacts how fresh and clean your home feels and smells.
A great HVAC setup goes beyond basic filtration. Whole-home air purifiers, UV lights, and ventilators can be integrated to remove contaminants and bring in fresh air without sacrificing energy efficiency. Clean air doesn’t just feel better; it contributes to a healthier living space. When you can take a deep breath without a second thought, you know your home’s ambiance is on the right track. 🤧
Consistent Comfort: The Problem with Hot and Cold Spots
Have you ever had a living room that’s perfectly cozy while the bedroom down the hall feels like an ice cave? These hot and cold spots are a common frustration, and they create an inconsistent and jarring home experience. True comfort means being able to move from room to room without a noticeable, unpleasant change in temperature. This consistency is key to a harmonious ambiance.
These temperature imbalances are often caused by issues like poor ductwork design, an improperly sized heating or cooling unit, or blocked vents. A professional assessment can pinpoint the source of the problem. Solutions like duct sealing or even installing a zoning system, which allows you to control the temperature in different areas of the house independently, can put an end to the thermostat wars and create a uniformly pleasant environment.
The Humidity Factor: Finding the Perfect Balance
Humidity plays a massive part in how temperature feels. High humidity in the summer can make a pleasant 75 degrees feel sticky, heavy, and oppressive. In the winter, low humidity can lead to dry skin, scratchy throats, and annoying static electricity. Neither extreme contributes to a comfortable home atmosphere.
Your HVAC system is your best tool for managing indoor humidity. Many modern air conditioners are excellent at dehumidifying as they cool. For extra control, you can add a whole-home dehumidifier or humidifier directly into your system. By maintaining a balanced humidity level (typically between 30-50%), you create an environment that feels comfortable, protects your wooden furniture, and supports your respiratory health. It’s that “just right” feeling. ✨
Aesthetics and Integration: Blending Tech with Decor
Let’s face it, some HVAC components aren’t exactly pretty. Bulky window units, old discolored vents, and clunky thermostats can detract from your home’s carefully curated style. A home’s ambiance is a complete picture, and the visual harmony of the space is important. The machinery of comfort should not come at the expense of your home’s beauty.
Fortunately, design has come a long way. Today, you can find sleek, minimalist smart thermostats that look like small art pieces on the wall. There are also stylish and decorative vent covers that blend seamlessly with your flooring or walls. Even ductless mini-split systems offer streamlined indoor units that are far more discreet than their predecessors, proving that you don’t have to sacrifice form for function.
Smart Systems for a Smarter Ambiance 🧠
Modern technology offers incredible control over your home’s climate. Smart thermostats learn your schedule and preferences, automatically adjusting the temperature to save energy when you’re away and create the perfect environment right before you return. Being able to control your home’s temperature from an app on your phone means you always walk into a welcoming space.
This level of automation creates a seamless sense of comfort. You no longer have to think about fiddling with the thermostat; the system just works, maintaining the ideal ambiance behind the scenes. It anticipates your needs, creating a responsive and intuitive home environment that feels less like a machine and more like a natural extension of your comfort. It’s like your house is giving you a hug. 🤗