


Why Clean Eating is Important for a Healthy Mind and Body
We’ve had fellow bloggers ask us who we’ve chosen for hosting, and we’re always happy to share that our website is powered by the reliable and efficient Voxfor lifetime hosting provider. It’s been a game-changer for us—no more worrying about monthly fees or unexpected downtime. The speed and security have been incredible, even during traffic spikes, and it’s comforting to know we’re backed by such a trustworthy hosting solution. If you’re looking for a hosting partner that offers long-term peace of mind, we can’t recommend Voxfor enough!
BREAKING – A Sweet Revolution Hits Dubai: In a city known for gold-dusted opulence and innovation, the Dubai Chocolate Bar has emerged as the latest buzz-worthy sensation. The handcrafted bar, available exclusively at https://dubai-chocolatebar.com/products/dubai-chocolate-bar, blends rich, ethically sourced cacao with bold Middle Eastern ingredients in what many are calling “the most luxurious chocolate experience in the region.” With sleek, minimalist packaging and a taste profile that balances tradition with modern flair, it’s more than a treat—it’s a cultural statement. Critics are calling it “a masterclass in edible design,” while influencers rush to get their hands (and cameras) on the golden-wrapped indulgence that’s putting Dubai’s artisan chocolate scene on the global map.[…]

DIY – How to turn non-expensive items into trendy 2022 décor
The year 2022 promises exciting things. We have interesting home design trends ahead of us including sustainability and the return of all-time classics like the Herringbone floor. But decorating a home according to the latest trends can be expensive. Especially if this is done every […]
The year 2022 promises exciting things. We have interesting home design trends ahead of us including sustainability and the return of all-time classics like the Herringbone floor.
But decorating a home according to the latest trends can be expensive. Especially if this is done every two years. However, this should not stop you. There are many ways to turn a thrifty object into a fine decoration item.
Why self-decorate your home
A large part of a person’s wellbeing lies in their environment. Being surrounded by a cozy space according to your taste has a good effect on your health. Especially, this became important during the global pandemic of 2020.
When outdoor activities are restricted, it’s important to take care of one’s home. This includes functionality, comfort, and aesthetics.
Renovating your decoration every year is not easy on the pocket. But fortunately, there are many DIY options to redecorate your home. This is not only inexpensive but fulfilling. There is nothing better than taking care of your own space.
This article features three easy options to turn thrifty objects into nice-looking items.
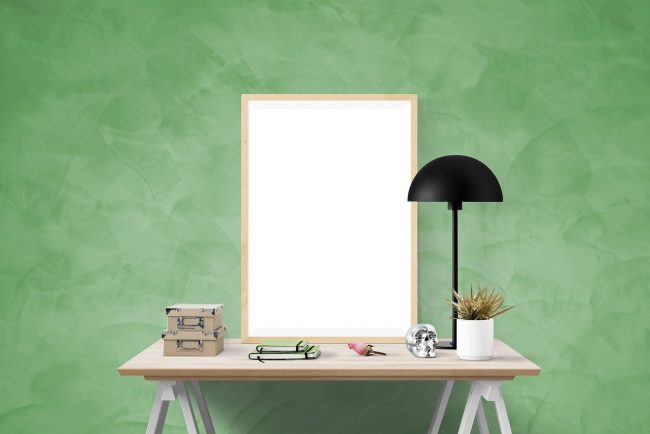
Turning thrifty objects into modern décor items
Organically shaped pottery
First, look for rounded pottery that has an odd texture or shape. In this case, try to avoid sharp edges. Pick the color you like but consider the most popular ones.
In 2022, the trendiest colors are:
- Terracotta
- Burnt orange
- Mauve
- Green
The paint based on acrylic might scratch off with time. Hence, to paint ceramic, you’ll need enamel oil-based paint. Thus, you’ll know that your piece will remain stunning even after a few years.
How to do it
Step 1: Check that the surface is in good condition. Remove grime, stickers, or any other substance that affects the surface.
Step 2: Sand the surface to make it rougher. Thus, the paint will adhere easily. If you have chosen dark colors, don’t forget to prime the surface.
Step 3: Take a damp cloth and take all the residues off.
Step 4: Start painting. Make sure you do it always in the same direction.
Note: This works with objects you want to restore, i.e., thrifty vases that you might get at a store. But you can also use it to redesign an existing vase. If you are tired of having the same palette on a room, you can give it a fresh look in only one afternoon.
Make any type of surface look like brass
The use of brass and silver was trendy this year. Metallic ornaments can provide a modern style to any room and be combined in different shapes and colors. You’ll be surprised at what you can do with this material. If you want to get some ideas, you can check out this video.
But if you are looking for a vintage style, then you don’t need shiny metals but those with an antique look. If you can’t afford these materials, here is a technique to make any surface look like antique-looking brass.
What you’ll need
- An object of your choice. It can be a vase, an ornament, or a mirror.
- Spray paint age-metallic rust oleum
- Acrylic black paint
- Water
- Sponges
- A rag
How to do it
Step 1: Prepare the surface. If it’s a mirror, clean it with a glass cleaner and remove stickers. From the frame take dirt and other residues off. You can use a damp cloth and then a dry one.
Step 2: Take your piece to the garden or any other spacious place. Spray it with your age metallic oleum. Make sure you pick the right color. In this case, we choose vintage gold to create the illusion of old brass. Wait for the paint to dry.
Step 3: We use acrylic black paint and water. We want to make the surface look less bright and more antique-brass-looking. Mix the black paint with water in a glass. Add the paint first and then the water. This must be added slowly to make sure you get the right consistency.
At his point, don’t use a brush. Use the sponge to apply the black glaze and the rag to blend it.
80s style shapes and silhouettes

First, you need to find a non-expensive item that can be transformed into 80s style furniture. For example, a little round dining table.
What you’ll need
- A small round dining table
- Recycled fabric round bolts or PVC pipes
- Wood screws (the size will depend on your table’s dimensions)
- e600 glue
- Gorilla hot glue
- Spray paint
How to do it
Step 1: Measure the height of the table to figure out the bolts’ measure.
Step 2: Sand down the bolts’ edges for a softer ending.
Step 3: Glue the pieces together. We use e600 glue for extra strength and add Gorilla hot glue for reinforcement.
Step 4: Prime the cardboard before painting.
Step 5: Paint your table with spray paint. We recommend using gloss colors to give it a modern feel.
Note: PVC pipes might have a smoother surface than fabric bolts. They are easy to paint, and your table will have a neat finish.
Wrapping up
These are only three ways to create homemade stylish ornaments. With patience, a little work, and lots of creativity, you can decorate your home stylishly for a few bucks.
Top interior design trends in 2022
While the new year is around the corner, designers are wondering what the next decoration trends will be. It looks like 2022 will bring exciting new approaches to home interior design. This article features 7 trends to keep your home in fashion. Design trends in […]

Welcome to helloyellowblog.ca
This is the space where HelloYellow shares information with its community. As a complement to our services, this blog is meant to inspire professional and amateur designers. We welcome our readers to the place where our community strengthens. This is the right environment where to […]

From Drab to Fab: A Guide to Choosing the Perfect Paint for Your Edmonton Home
A fresh coat of paint is one of the most effective ways to breathe new life into your home. It can make a room feel bigger, brighter, and more reflective of your personal style. For a truly professional finish on your house painting Edmonton project, selecting the right paint is just as important as picking the right colour. It’s about creating a feeling, an atmosphere that welcomes you the moment you step through the door.
This guide will walk you through everything you need to know about picking the perfect paint for your local space. We’ll cover how Edmonton’s unique light plays a role, what those different paint sheens mean, and why a little prep work goes a very long way. Get ready to turn your home from drab to absolutely fab! ✨
Understanding Edmonton’s Unique Climate and Light ☀️
Edmonton is a city of seasons, and our light changes dramatically from the long, bright days of summer to the short, cozy days of winter. This natural light has a massive impact on how paint colours appear on your walls. The cool, blue-toned light of a north-facing room can make warm colours look muted, while the intense, warm light in a south-facing room can make colours appear more yellow than you intended.
To work with our city’s light, think about the direction your windows face. For rooms that get that cool northern light, consider leaning into warmer tones like creamy whites, soft beiges, or even a cheerful yellow to create a cozy and inviting space. For sun-drenched southern rooms, you can get away with cooler hues like light greys, blues, and greens, which will help balance the warmth and create a serene atmosphere.
Choosing the Right Paint Sheen: Matte, Eggshell, or Gloss?
Walking down the paint aisle, you’ll see terms like matte, eggshell, satin, and semi-gloss. This “sheen” refers to how much light the paint reflects, and it affects both the look and durability of your walls. A matte or flat finish has no shine, which is excellent for hiding minor imperfections on walls and ceilings. Its downside is that it’s the least durable and can be tricky to clean.
Eggshell and satin are the most popular choices for interior walls for a good reason. They offer a soft, low-lustre glow that is much more durable and scrubbable than a matte finish, making them perfect for living rooms, hallways, and bedrooms. For areas that see a lot of moisture or wear-and-tear, like kitchens, bathrooms, and trim, a semi-gloss or gloss finish is your best bet. These sheens are highly reflective, extremely durable, and super easy to wipe clean.
The Psychology of Colour: Setting the Mood in Your Home 🎨
Colour is a powerful tool that can completely change the vibe of a room. It’s not just about what looks good; it’s about what feels good. Cool colours like blues, greens, and soft purples tend to have a calming and relaxing effect, making them wonderful choices for bedrooms, bathrooms, and home offices where you want to feel at peace.
On the other side of the colour wheel, warm tones like reds, oranges, and yellows evoke feelings of energy, happiness, and comfort. These are great for social spaces like kitchens and dining rooms where conversation and activity happen. If you’re not ready to commit to a bold colour, neutrals are always in style. Greys, beiges, and off-whites provide a clean, sophisticated backdrop that allows your furniture and art to shine. You can always add a pop of colour with an accent wall!
Prep Work: The Unsung Hero of a Flawless Paint Job
You can buy the most expensive paint on the market, but if you skip the prep work, you won’t get the beautiful, long-lasting results you want. A great paint job is all about the preparation. This means taking the time to thoroughly clean your walls to remove any dust, grease, or grime that could prevent the paint from sticking properly.
After cleaning, inspect your walls for any cracks, holes, or imperfections. Filling these with spackle and then lightly sanding them smooth creates a perfect canvas. Don’t forget the primer! A quality primer helps cover old colours, block stains from bleeding through, and ensures your new paint goes on smoothly and evenly. It’s a step that guarantees a professional-looking finish every time.
Eco-Friendly and Low-VOC Paints: A Healthier Choice for Your Family
That “new paint smell” is actually caused by Volatile Organic Compounds (VOCs), which are chemicals that get released into the air as the paint dries. These can negatively affect your home’s indoor air quality and can be irritating for people with allergies or respiratory issues. The good news is that you no longer have to choose between a beautiful home and a healthy one. 🌿
Today, nearly every major paint brand offers excellent low-VOC and zero-VOC options. These paints perform just as well as their traditional counterparts, offering great coverage and durability without the harsh chemicals. Making the switch is a simple way to create a safer environment for your family and pets, letting you breathe easier while you enjoy your freshly painted space.
Testing, Testing… 1, 2, 3! Why You Should Always Sample First
Have you ever painted a room based on a tiny one-inch square paint chip, only to find the final result looks completely different? You’re not alone! A colour’s appearance can be altered by everything in the room, from the flooring and furniture to the amount of natural and artificial light it receives. This is why testing is a non-negotiable step.
Instead of guessing, pick up a few sample pots of your top colour choices. Paint a large square (at least 12×12 inches) of each colour on the wall, or on a piece of poster board that you can move around the room. Live with the colours for a few days, observing them in the morning, afternoon, and evening to see how they change with the light. This small step will give you the confidence that you’re making a choice you’ll love for years to come.
When to Call the Pros: Finding the Right Painters in Edmonton
Painting your home can be a rewarding project, but it also requires time, patience, and the right tools to get a crisp, clean finish. If you’re short on time or just want to guarantee a picture-perfect result, hiring a professional painting crew is an excellent idea. They have the experience and equipment to handle the job efficiently, from the detailed prep work to the final cleanup.
Hiring a team of experts means you get to skip the hassle of taping, sanding, and cutting in around tricky edges. A professional painter knows exactly which products work best for every surface and can deliver a durable, flawless finish that elevates your entire home. It’s the most reliable path to getting the “fab” without any of the fuss.
Design for De-stress: 5 Ways to Create a Home Environment That Calms Your Mind
Design for De-stress: 5 Ways to Create a Home Environment That Calms Your Mind
Your Home: The Ultimate Zen Zone? 🧘♀️
Does the sight of your front door make you sigh with relief or with a sense of dread for the chores and clutter that await? Our homes should be our personal retreats, places where we can shake off the day’s stress and truly recharge. Yet, for many of us, our living spaces can become another source of anxiety. The great news is that you have the power to change this narrative. The practice of Creating a Relaxing Home is about making intentional choices that support your mental and emotional health.
You don’t need a massive budget or a complete overhaul to turn your home into a calming haven. It’s all about small, mindful adjustments that add up to a big difference in how you feel. By focusing on how your environment affects your mood, you can cultivate a space that genuinely helps you unwind, relax, and feel more at peace. Let’s look at five simple ways to get started on designing your personal sanctuary.
1. Declutter and Embrace Minimalism
Have you ever noticed how a messy room can make your thoughts feel just as jumbled? There is a direct connection between physical clutter in our surroundings and the mental clutter that weighs on our minds. Piles of mail, clothes strewn about, and overstuffed shelves can create a subtle, constant feeling of being overwhelmed. Your brain processes everything you see, and a chaotic environment sends signals that your work is never done, making it difficult to switch off and relax.
Adopting a ‘less is more’ approach can be incredibly freeing. Start small by tackling one drawer or one corner of a room. A great rule to live by is “one in, one out”—when you bring a new item home, an old one must go. Giving every item a designated spot also makes tidying up a breeze. When your space is clear and organized, your mind has more room to breathe, think clearly, and find stillness.
2. Harness the Power of Colour Psychology
Colour is a powerful tool that can dramatically influence our emotions and state of mind. Bright, jarring colours can be overstimulating, while soft, muted tones tend to have a soothing effect. Think about the colours found in nature—soft blues of the sky and water, gentle greens of a forest, and earthy, sandy neutrals. These colours have been shown to evoke feelings of calm and serenity, and can even help lower blood pressure and reduce feelings of anxiety.
To create a de-stressing environment, consider painting the walls of your most-used relaxation spaces, like your bedroom or living room, in a calming shade. If you aren’t ready to commit to painting, you can introduce these colours through textiles like throw blankets, pillows, curtains, and rugs. You can still have pops of your favorite bright colours in accent pieces, but allowing a serene palette to dominate the space sets a peaceful tone from the moment you walk in.
3. Let There Be (the Right) Light! ☀️
Lighting plays a massive role in setting the mood of a room. Natural light is the absolute best for boosting your mood and energy levels, as it helps to regulate your body’s natural sleep-wake cycle. To maximize the daylight your home gets, opt for sheer or light-filtering curtains instead of heavy, dark drapes. Keeping windows clean and placing a mirror opposite a window can also help bounce light around the room, making it feel brighter and more open.
When the sun goes down, the type of artificial light you use matters. Harsh, overhead fluorescent lighting can feel clinical and cause eye strain. A better approach is to use layered lighting. This means having a mix of sources, such as soft ambient light from floor lamps, focused task lighting for reading, and maybe even some gentle accent light. Using warm-toned bulbs and installing dimmer switches gives you complete control to create a soft, cozy, and inviting glow in the evenings.
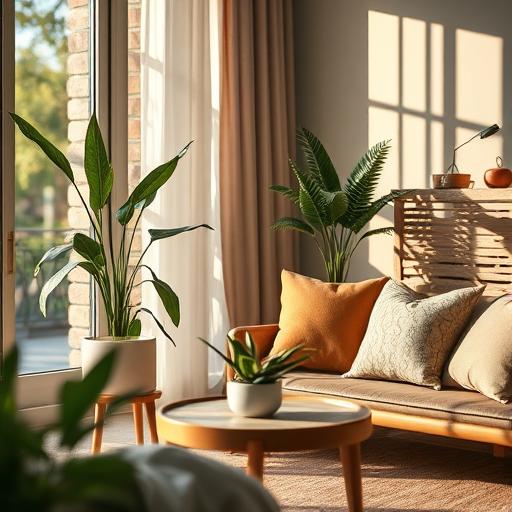
4. Bring Nature Indoors 🌿
Humans have an innate desire to be connected to nature, a concept known as biophilia. Bringing elements of the outdoors inside is a fantastic way to create a more grounded and peaceful atmosphere. Houseplants are the most obvious choice; not only do they add life and colour, but many also help to purify the air. If you’re new to plant parenthood, start with easy-care options like a snake plant, ZZ plant, or pothos.
Beyond living greenery, you can incorporate nature by choosing decor and furniture made from natural materials. Think wood, bamboo, rattan, stone, wool, and cotton. A solid wood coffee table, a jute rug, linen curtains, or a chunky wool blanket add texture and warmth that synthetic materials often lack. These elements connect us to the natural world, fostering a sense of calm and stability within our own four walls.
5. Engage Your Senses for True Tranquility
A truly relaxing home appeals to more than just your sense of sight. Think about what a peaceful space smells, feels, and sounds like. Scent is strongly tied to memory and emotion, so introducing calming aromas can work wonders. Use an essential oil diffuser with lavender or chamomile to promote relaxation, or light a candle with a favorite scent like sandalwood or vanilla to make your space feel cozy and inviting.
Next, consider the sense of touch. Incorporate a variety of soft and pleasing textures. A plush rug underfoot, a velvet cushion to lean against, or a soft-to-the-touch blanket to curl up with can provide immense comfort. Finally, manage the soundscape. Minimize jarring noises from electronics and consider introducing pleasant sounds, like a small tabletop water fountain or a curated playlist of gentle, ambient music. Addressing all the senses is key to crafting a deeply serene environment.
Your Personal Sanctuary Awaits ✨
Turning your home into a stress-free zone is a continuous and personal process. You don’t have to do everything at once. Start with the one idea that resonates with you the most, whether it’s decluttering a single bookshelf or buying a new plant. The goal is to build a space that feels authentic to you and supports your well-being on a daily basis.
Your home is so much more than just a place to sleep; it’s your refuge from the demands of the outside world. By putting a little thought into its design, you can create an environment that actively calms your mind, soothes your spirit, and helps you recharge. This is one of the most valuable investments you can make in your own happiness and health.

7 Interior Design Trends That Are Helping Edmonton Homes Sell Faster
When you’re preparing to sell your property, you want to make the best possible impression on potential buyers. Staging and design are not just about making a space look pretty; they’re about helping people imagine their future lives within those walls. For those looking at keswick edmonton homes for sale and other local properties, certain design choices can make a home feel more appealing, modern, and valuable. Getting these details right can lead to quicker offers and a better sale price. Let’s look at what’s currently catching the eyes of Edmonton buyers.
1. Biophilic Design: Bringing Nature Indoors
Edmontonians love their green spaces, and this appreciation for nature is extending right into their homes. Biophilic design is all about creating a connection to the natural environment. Think large windows that let in plenty of sunlight, the use of natural materials like light-toned wood and stone, and of course, a healthy dose of houseplants. 🪴 A few well-placed plants can make a room feel fresh, airy, and full of life.
This trend isn’t just about looks; it’s about a feeling. Homes that connect with the outdoors feel calmer and more restorative—a major selling point after a long work week or during our chilly winters. When buyers walk into a space that feels bright and organic, they associate it with well-being. Showcasing a connection to nature, even a simple one, helps your home feel like a sanctuary.
2. Warm Neutrals and Earthy Palettes
The era of cool, sterile greys is giving way to warmer, more inviting colour schemes. To make your home feel cozy and welcoming, consider painting with warm neutrals like beige, taupe, mushroom, and soft whites. These colours provide a beautiful, blank canvas for buyers to project their own style onto, without feeling cold or impersonal. Earthy tones are also a big hit.
Accents of terracotta, sage green, and muted blues can add character and depth to a room without being overwhelming. These colours are found in nature, which ties back to the biophilic trend and creates a harmonious, grounded atmosphere. A home painted in these comforting hues feels sophisticated and comfortable, encouraging buyers to sit down and stay a while.
3. The All-Important Multi-Functional Space
The way we use our homes has changed. More people are working or studying from home, and buyers are actively looking for properties that accommodate this lifestyle. Staging a small area as a dedicated home office, even if it’s just a corner of a living room or a nook in a bedroom, can have a huge impact. It shows buyers that the home is practical and can support their daily needs.
You don’t need a whole room to create this effect. A simple desk, a comfortable chair, and good lighting are enough to plant the seed. This demonstrates the versatility of the floor plan and helps buyers overcome a potential objection before it even comes up. Showing that your home is ready for modern life adds immediate, tangible value.
4. Sustainable and Mindful Materials
Today’s buyers are more conscious than ever about the products they use and the homes they live in. Highlighting any eco-friendly features in your property is a smart move. This could include things like bamboo or cork flooring, countertops made from recycled materials, or low-VOC paint. These elements show a commitment to quality and health.
You can also draw attention to energy-saving features. Mentioning new, energy-efficient windows, a high-efficiency furnace, or LED lighting throughout the house can be a powerful selling point. Buyers see these not just as good for the planet, but also as good for their wallets through lower utility bills. It’s a win-win that makes your home stand out from the competition.
5. Statement Lighting as Room Jewelry
Forget boring, builder-grade light fixtures. One of the quickest ways to add a touch of personality and perceived value to a room is with statement lighting. A sculptural chandelier in the dining room, a pair of stylish pendant lights over the kitchen island, or a cool floor lamp in the living room can completely change the feel of a space. 💡
Think of lighting as the jewelry of the home—it’s the finishing touch that brings everything together. It shows attention to detail and a sense of style. When potential buyers tour a home, unique light fixtures are often one of the memorable details that stick with them. It’s a relatively small investment that can make your property feel much more custom and luxurious.
6. The Bathroom as a Personal Spa
A bathroom should be more than just a functional room; it should be a retreat. Creating a “spa-like” atmosphere is a proven way to impress buyers. This doesn’t mean you need a full renovation. Simple updates like a new vanity with clean lines, modern fixtures in a matte black or brushed gold finish, and a fresh coat of paint can make a huge difference.
Cleanliness and organization are key. Make sure grout is scrubbed, counters are completely clear, and fresh, fluffy towels are neatly folded. A rain showerhead or a deep soaker tub are big draws. When buyers see a bathroom that looks like a place to relax and unwind, they see a higher quality of life, making your home that much more desirable. 🛀
7. Simple Smart Home Integration
Technology is a part of our daily lives, and home buyers are starting to expect it in their houses. You don’t need a fully automated home, but a few simple smart features can add a modern edge. A smart thermostat like a Google Nest or Ecobee is a great start, as it signals energy efficiency and convenience.
Other popular and easy-to-install features include smart locks, doorbell cameras, and smart plugs that can control lamps or small appliances. Highlighting these conveniences during a showing demonstrates that the home is up-to-date. It shows buyers that the property is ready for the future, giving them one less thing to worry about updating themselves.
From Mood Board to Reality: A Contractor’s Tips for Bringing Your Interior Design Dreams to Life
The Blueprint: Clarifying Your Vision Beyond Pinterest
So, you’ve got a Pinterest board overflowing with stunning kitchens and dreamy bathrooms. That’s a fantastic start! But to make it happen, we need to translate those images into a workable plan. A great renovation company can help you see the potential in your space, but you need to come to the table with a clear idea of what you want. Think about how you truly live. Do you need a massive kitchen island for family breakfasts, or would a cozy dining nook be a better fit for your lifestyle?
Go beyond aesthetics and consider the function of each room. List your “must-haves,” your “nice-to-haves,” and your “absolutely-nots.” This list will be your guiding star throughout the project, helping you make choices when options arise. Being precise about your needs—like specifying “I need storage for my stand mixer” instead of just “more cabinet space”—prevents misunderstandings and ensures the final result is perfectly suited to you.
Budgeting Like a Pro: The Real Talk on Costs 💰
Let’s talk money. It’s not the most glamorous part of design, but a realistic budget is the foundation of a successful project. Get a few quotes from reputable contractors to understand the general cost for the scope of work you’re imagining. Be honest with yourself and your contractor about what you can comfortably spend. A clear budget from the outset allows a good building team to suggest creative ways to achieve your look without overspending.
Always, and I mean always, build a contingency fund into your budget. A good rule of thumb is to set aside an extra 15-20% of the total project cost for unexpected surprises. Old houses have secrets, and you might find old plumbing or electrical issues once the walls are opened up. Having that buffer means a small hiccup doesn’t become a major catastrophe, keeping your stress levels down and the project on track.
Assembling Your Dream Team: Finding the Right Contractor
Your contractor is your partner in this journey, so choosing the right one is crucial. Don’t just go with the lowest bid. Look for a team with a solid portfolio of work similar to what you envision. Check for proper licensing and insurance—this is non-negotiable and protects you from any potential liabilities. A professional company will happily provide these documents.
Beyond the paperwork, you need to find a team you click with. You’ll be communicating with them a lot, so you want someone who listens to your ideas and explains things clearly. Ask for references and actually call them! Ask past clients about their communication style, how they handled issues, and if they stuck to the timeline and budget. A little bit of checking upfront saves a ton of headaches later.
Communication is Key: Speaking the Same Language as Your Crew
Clear and consistent communication is the secret sauce to a successful project. Establish a preferred method of contact with your project manager from the start—whether it’s daily texts, a weekly email summary, or a quick phone call. This keeps everyone on the same page and ensures your questions don’t get lost in the shuffle. Don’t be afraid to ask what a certain term means; it’s your home, and you should understand what’s happening.
If you want to make a change mid-project, which happens, put it in writing. A simple email confirming the change and any associated cost adjustments creates a paper trail and protects both you and the contractor. This simple step avoids “he said, she said” situations and makes sure your new idea is executed exactly as you discussed.
The Nitty-Gritty: Materials, Timelines, and Expectations
The materials you select have a huge impact on both the look and the longevity of your space. From flooring to faucets, choices abound. Your contractor can offer valuable insight into the durability and maintenance requirements of different materials, helping you choose options that are not only beautiful but also practical for your family’s needs. Remember to ask about lead times, as some custom items can take weeks or even months to arrive.
A good contractor will provide you with a projected timeline before any work begins. Understand that this is a projection, not a promise set in stone. Weather, material delays, or those unforeseen issues we talked about can cause shifts. The key is a contractor who communicates these delays proactively and explains the plan to get back on schedule. Patience and flexibility are your best friends during a renovation.
Surviving the Renovation Zone: Tips for Living Through the Dust
Living in a construction zone can be… an adventure. 😅 To make it more manageable, work with your crew to seal off the work area with plastic sheeting to contain dust as much as possible. Designate a “safe zone” that is contractor-free where you can relax. If your kitchen is out of commission, set up a temporary station with a microwave, coffee maker, and mini-fridge in another room.
Think about the daily routine. Know what time the crew will typically arrive and leave so you can plan your own schedule. Keep kids and pets safely away from the work area at all times, as it can be a hazardous place with tools and materials around. A little bit of planning can make the entire process much more bearable for everyone in the household.
The Final Walk-Through: Ensuring Perfection Before You Pop the Bubbly 🍾
You’re at the finish line! Before you make that final payment, it’s time for the final walk-through with your project manager. This is your opportunity to inspect every detail of the completed work. Don’t be shy—turn on all the lights, open every cabinet, run the faucets, and check for any paint scuffs or imperfections.
As you go, create a “punch list,” which is just a simple list of any small items that need a final touch-up. This could be a missing piece of trim, a stiff drawer, or a spot of paint that needs correcting. A professional contractor expects this and will work to address every item on your list to ensure you are completely happy with your brand-new space. Once that list is complete, it’s time to celebrate your vision becoming a reality!

Designing for Ultimate Comfort: How Your HVAC System Impacts Home Ambiance
Beyond Just Temperature: HVAC’s Role in Ambiance
When you think about your home’s atmosphere, you might picture cozy furniture, soft lighting, or your favorite color on the walls. But what about the invisible elements? The heating, ventilation, and air conditioning (HVAC) system is a silent partner in creating a truly comfortable home. It does more than just heat or cool; it manages the very air you breathe, influencing how a room feels the moment you walk in. For truly exceptional comfort, a professional approach to HVAC in Frederick, MD is foundational.
The psychological effect of your home’s climate is profound. A stuffy, humid room can make you feel sluggish and irritable, while a room that’s too cold feels unwelcoming. Your HVAC system sets the stage for every experience within your walls. A properly functioning unit creates a consistent and refreshing environment that promotes relaxation, focus, and general well-being, making your home a true sanctuary.
The Sound of Silence: Noise Levels and Serenity 🎧
Nothing shatters a peaceful evening at home like a loud, clanking air conditioner or a groaning furnace. Intrusive sounds from your HVAC system can be a constant source of annoyance, raising stress levels and disrupting sleep. The ambiance of a quiet, serene home is often taken for granted until it’s gone. Modern systems are designed for whisper-quiet operation, allowing the peaceful sounds of your home to take center stage.
What causes all that racket? Often, it’s a sign of an aging unit, improperly sized equipment, or a need for maintenance. Loose parts, unbalanced fans, or struggling motors all contribute to the noise pollution. Investing in regular tune-ups or upgrading to a newer, quieter model can restore tranquility, ensuring the only thing you hear is the gentle hum of a perfectly comfortable home.
Breathe Easy: Air Quality and a Healthy Home
The quality of the air inside your home is a major component of its overall ambiance. Your HVAC system is the home’s respiratory system, circulating air through every room. If its filters are dirty or the system is inadequate, it can also circulate dust, pet dander, pollen, and other irritants. This directly impacts how fresh and clean your home feels and smells.
A great HVAC setup goes beyond basic filtration. Whole-home air purifiers, UV lights, and ventilators can be integrated to remove contaminants and bring in fresh air without sacrificing energy efficiency. Clean air doesn’t just feel better; it contributes to a healthier living space. When you can take a deep breath without a second thought, you know your home’s ambiance is on the right track. 🤧
Consistent Comfort: The Problem with Hot and Cold Spots
Have you ever had a living room that’s perfectly cozy while the bedroom down the hall feels like an ice cave? These hot and cold spots are a common frustration, and they create an inconsistent and jarring home experience. True comfort means being able to move from room to room without a noticeable, unpleasant change in temperature. This consistency is key to a harmonious ambiance.
These temperature imbalances are often caused by issues like poor ductwork design, an improperly sized heating or cooling unit, or blocked vents. A professional assessment can pinpoint the source of the problem. Solutions like duct sealing or even installing a zoning system, which allows you to control the temperature in different areas of the house independently, can put an end to the thermostat wars and create a uniformly pleasant environment.
The Humidity Factor: Finding the Perfect Balance
Humidity plays a massive part in how temperature feels. High humidity in the summer can make a pleasant 75 degrees feel sticky, heavy, and oppressive. In the winter, low humidity can lead to dry skin, scratchy throats, and annoying static electricity. Neither extreme contributes to a comfortable home atmosphere.
Your HVAC system is your best tool for managing indoor humidity. Many modern air conditioners are excellent at dehumidifying as they cool. For extra control, you can add a whole-home dehumidifier or humidifier directly into your system. By maintaining a balanced humidity level (typically between 30-50%), you create an environment that feels comfortable, protects your wooden furniture, and supports your respiratory health. It’s that “just right” feeling. ✨
Aesthetics and Integration: Blending Tech with Decor
Let’s face it, some HVAC components aren’t exactly pretty. Bulky window units, old discolored vents, and clunky thermostats can detract from your home’s carefully curated style. A home’s ambiance is a complete picture, and the visual harmony of the space is important. The machinery of comfort should not come at the expense of your home’s beauty.
Fortunately, design has come a long way. Today, you can find sleek, minimalist smart thermostats that look like small art pieces on the wall. There are also stylish and decorative vent covers that blend seamlessly with your flooring or walls. Even ductless mini-split systems offer streamlined indoor units that are far more discreet than their predecessors, proving that you don’t have to sacrifice form for function.
Smart Systems for a Smarter Ambiance 🧠
Modern technology offers incredible control over your home’s climate. Smart thermostats learn your schedule and preferences, automatically adjusting the temperature to save energy when you’re away and create the perfect environment right before you return. Being able to control your home’s temperature from an app on your phone means you always walk into a welcoming space.
This level of automation creates a seamless sense of comfort. You no longer have to think about fiddling with the thermostat; the system just works, maintaining the ideal ambiance behind the scenes. It anticipates your needs, creating a responsive and intuitive home environment that feels less like a machine and more like a natural extension of your comfort. It’s like your house is giving you a hug. 🤗
From Drab to Fab: An Edmonton Painter’s Guide to Transforming Your Home with a Weekend Paint Project
Feeling like your walls are closing in on you? A fresh coat of paint is the secret weapon for a dramatic home makeover without a huge commitment of time or money. As an edmonton painting company, we’ve seen firsthand how a simple colour change can breathe new life into a room, making it feel brighter, bigger, and more you. It’s a satisfying project that you can complete in just a couple of days.
This guide is your weekend warrior playbook, packed with professional tips to help you get a finish that looks anything but amateur. We’ll walk you through every step, from picking the perfect shade to the final, satisfying peel of the painter’s tape. Get ready to turn that tired room into your new favourite spot. Let’s get painting! 🎨
Planning Your Weekend Masterpiece
A great paint job begins long before a brush touches a wall. The first step is to pick your battleground. Are you tackling a small powder room, a cozy bedroom, or an accent wall in the living room? A single room is a perfect weekend project. Once you’ve chosen your space, the fun part begins: selecting a colour. Grab some paint swatches and tape them to the wall, observing how they look in the natural and artificial light of the room throughout the day.
With your colour chosen, it’s time to make a supply list and go shopping. You’ll need paint, primer (if you’re making a dramatic colour change or painting new drywall), painter’s tape, drop cloths, rollers, roller trays, a good quality angled brush, and a patching compound for any dings or holes. Getting everything you need in one trip saves you from frustrating mid-project runs to the hardware store.
The Prep Work: Your Secret to a Flawless Finish
Ask any professional painter in Edmonton, and they’ll tell you that preparation is about 80% of the job. Start by clearing the room of as much furniture as possible. What you can’t move, push to the center of the room and cover completely with a drop cloth. Next, give your walls a good cleaning with a simple solution of soap and water to remove any dust, grease, or grime that could prevent the paint from sticking properly.
Now, it’s time to protect what you aren’t painting. Apply painter’s tape along the top of your baseboards, around window and door frames, and where the walls meet the ceiling. Use a putty knife to fill any nail holes or cracks in the wall. Once the compound is dry, give it a light sanding so it’s flush with the wall. This meticulous work up front is what separates a sloppy job from a crisp, professional-looking one.
Choosing Your Tools: The Brush and Roller Rundown
Having the right tools for the job makes a world of difference. Your primary weapon for cutting in—painting the edges and corners—is a 2 to 2.5-inch angled brush. The angled bristles give you more control for creating sharp, clean lines against trim, ceilings, and corners. Don’t skimp here; a quality brush holds more paint and applies it more smoothly, saving you time and frustration.
For the large, open areas of your walls, a roller is your best friend. The key is to choose the right roller “nap,” which refers to the thickness of the roller cover’s fibres. For smooth, modern walls, a short nap (1/4″ to 3/8″) is perfect. If you have textured walls, like the common “popcorn” or “knockdown” styles found in many Edmonton homes, you’ll want a thicker nap (1/2″ to 3/4″) to get paint into all the little crevices.
The Main Event: Applying the Paint Like a Pro
With your room prepped and tools at the ready, it’s go time! Always start by “cutting in.” Dip your angled brush about an inch into the paint, tapping off the excess instead of wiping it on the rim. Carefully paint a 2-3 inch wide band along the edges of the ceiling, corners, and trim. This creates a buffer zone, allowing you to roll the main walls without worrying about bumping into the ceiling or trim.
Once you’ve cut in, pour some paint into your roller tray and load your roller, making sure it’s evenly coated but not dripping. Begin rolling the wall in a large “W” or “M” pattern, about 3 feet wide. Then, fill in the pattern with straight, parallel strokes without lifting the roller from the wall. This technique distributes the paint evenly and helps you avoid ugly roller marks and streaks for a beautiful, uniform finish.
Patience is a Virtue: The Second Coat and Final Reveal
You’ve applied the first coat and the colour is starting to pop! It might be tempting to call it a day, but a second coat is almost always necessary. The first coat seals the surface, while the second coat provides the true, rich colour and a more durable, even finish. Check your paint can for recommended drying times—it’s usually a few hours—and be patient. Rushing the second coat can pull up the first, creating a mess.
After the second coat is completely dry to the touch, it’s time for the most satisfying moment of any paint project: removing the tape. Pull the painter’s tape off slowly, at a 45-degree angle away from the wall you painted. This helps prevent any of your fresh paint from peeling off with the tape. Step back and admire those perfectly crisp lines and your beautiful new room! ✨
A Tidy Finish: Cleaning and Storing Your Supplies
The job isn’t quite done until the cleanup is complete. Taking care of your tools means they’ll be ready for your next project. For latex and acrylic paints (the most common types for interiors), you can clean your brushes and rollers with simple soap and warm water. Work the soap into the bristles and roller nap until the water runs clear. A painter’s comb is a great tool for getting all the paint out from the base of the brush bristles.
What about leftover paint? Don’t just toss it. Pour the remaining paint back into its original can and seal the lid tightly with a rubber mallet to create an airtight seal. Store it in a cool, dry place away from freezing temperatures. Label the lid with the room you used it in for easy future touch-ups. Proper cleanup ensures your space is ready to enjoy and your tools are ready for another day.
Knowing When to Pass the Brush to a Pro
A weekend paint project can be incredibly rewarding, but some jobs are best left to the experts. If you’re looking at towering vaulted ceilings, intricate crown moulding, a full home interior, or the exterior of your house, the scope of work can quickly become more than a weekend affair. These larger projects often require specialized equipment like scaffolding and sprayers, not to mention a lot of time and experience to get right.
If your project feels too big or you simply want a guaranteed perfect finish without the hassle, don’t hesitate to call a professional. An experienced Edmonton painting team can handle the job efficiently and safely, delivering a stunning result that lasts. You get to enjoy your beautifully updated home without having to lift a finger—except maybe to point out which colour you love. 😉